Golden Circle Day Tours
What camera settings do you use for the Northern Lights?

What camera settings do you use for the Northern Lights?

Exact camera and phone settings for the Northern Lights in Iceland: manual mode, f/2.8, ISO 1600–3200, 5–15 sec shutter, tripod, manual focus to infinity.

For a DSLR or mirrorless camera, shoot in manual mode at f/2.8 (or your widest aperture), ISO 1600-3200, and a 5-15 second shutter, with manual focus set to infinity, on a tripod, in RAW. These values gather the faint light your eyes barely register, so the aurora lands bright and sharp.

Key takeaways

  • Aperture: open as wide as it goes, ideally f/2.8; every stop wider doubles the light.
  • ISO 1600-3200 is the working range; push higher only if the display is faint.
  • Shutter 5-15 seconds — use the shorter end (5-8 sec) when the aurora is dancing, or it blurs into a green smear.
  • Manual focus to infinity + a tripod — autofocus fails in the dark and handheld is impossible at these shutter speeds.
  • Phone: Night mode 10-30 seconds, rear 1× lens, flash OFF, timer on, propped steady.
  • Shoot RAW so you can recover colour and shadow later; the aurora is often stronger in the file than on the screen.

What are the exact camera settings, step by step?

Set these before pickup so you are not fumbling with cold hands at -10°C. Every value is a starting point — adjust the shutter to how fast the lights are moving.

  1. Mode: switch to full Manual (M). Auto modes underexpose the night sky badly.
  2. Aperture: open to f/2.8, or the smallest f-number your lens allows (f/1.8, f/2, f/3.5 — use the widest you have).
  3. ISO: start at 1600. Raise toward 3200 for faint aurora; drop back if bright bands blow out.
  4. Shutter speed: 5-15 seconds. Use 5-8 sec when the aurora is actively dancing to keep the curtains crisp; 10-15 sec for slow, faint glows.
  5. Focus: switch the lens to manual focus and set it to infinity — focus on a distant light or the moon in daylight-bright live view, then don't touch it.
  6. File format: shoot RAW (not JPEG) so you can lift shadows and correct colour afterwards.
  7. Stability: mount a tripod and trigger with a 2-second timer or remote so pressing the shutter doesn't shake the frame.
  8. White balance: around 3500-4000K gives natural results, but in RAW you can fix this later.
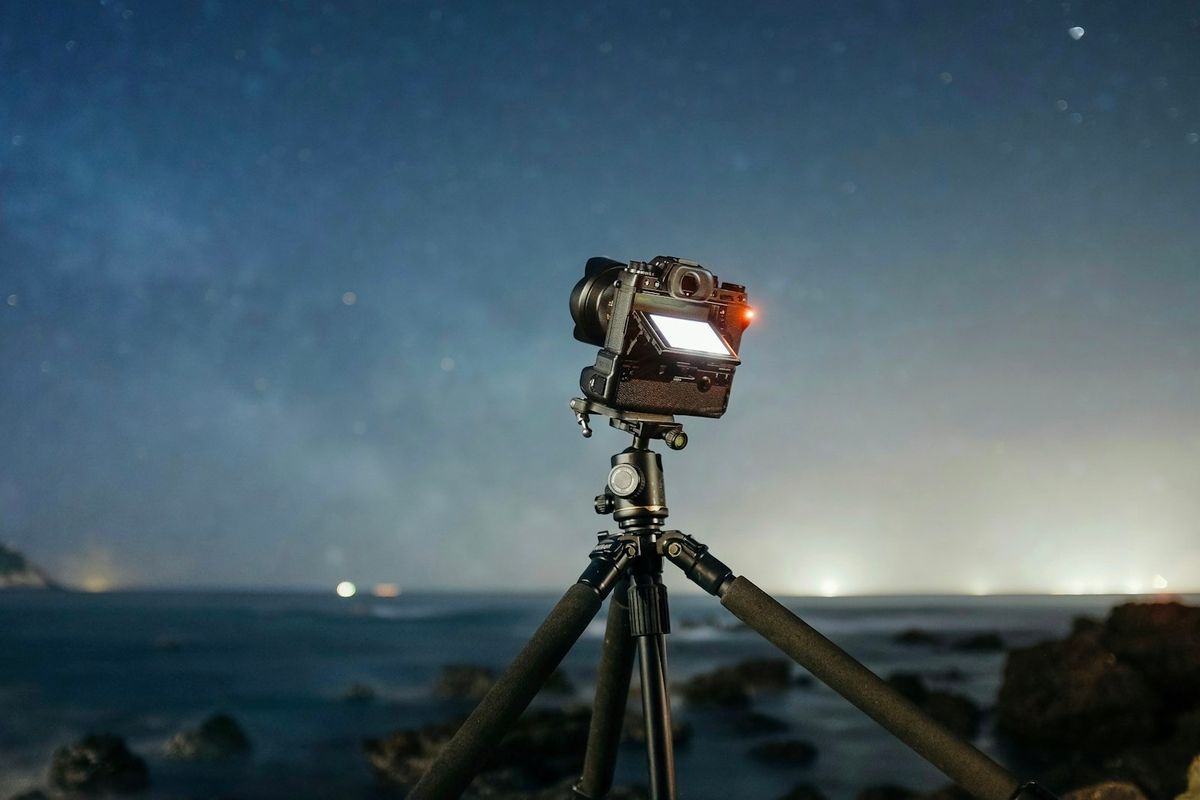
A camera on a tripod set up to photograph the night sky on a long exposure

Can you photograph the Northern Lights with an iPhone or Android?

Yes — modern phones capture the aurora well in Night mode on a steady surface. You will not get DSLR sharpness, but a clear green curtain is realistic.

  1. Turn on Night mode and set the exposure to 10-30 seconds (drag the slider to its maximum).
  2. Use the rear 1× (main) lens — it has the widest aperture and biggest sensor; avoid the ultra-wide and zoom.
  3. Flash OFF — it lights nothing useful and ruins the exposure.
  4. Prop the phone on a tripod, wall, or car roof — any movement over a 10-30 second exposure blurs everything.
  5. Use the timer (or voice/volume-button shutter) so tapping the screen doesn't shake it.
  6. Tap to lock focus on a distant light, then hold still until the capture finishes.

On our small-group tour the guide will walk between guests helping set exactly these values on your phone or camera — it is part of the trip, not an upsell.

Starting settings at a glance: camera vs. phone
SettingCameraPhone
ModeManual (M)Night mode
Aperturef/2.8 (widest)Fixed (use 1× lens)
ISO1600-3200Auto
Shutter / exposure5-15 sec10-30 sec
FocusManual, infinityTap distant light
Flashn/aOFF
StabilityTripod + timerSteady surface + timer
FileRAWDefault

Common mistakes

Most failed aurora photos come from a handful of avoidable errors:

  • Leaving the camera in Auto or the phone without Night mode — the sky comes out black or a grey blur.
  • Autofocus in the dark — the lens hunts and never locks. Switch to manual and set infinity in advance.
  • Shooting handheld — any shutter over ~1/30 sec needs a tripod or a solid surface; there is no steady enough hand at 10 seconds.
  • A 20-30 second exposure on active aurora — fast-moving curtains blur into a featureless green wash. Shorten to 5-8 seconds when it's dancing.
  • Forgetting the 2-second timer — pressing the shutter shakes the whole frame.
  • Using the phone flash or the ultra-wide/zoom lens — both waste light. Flash off, main 1× lens only.
  • Chasing a high KP number instead of clear skies — in Iceland a KP of 2+ under the auroral oval is plenty; a white (clear) patch on the vedur.is cloud map matters far more. Check the Icelandic Met Office aurora forecast before you head out.
  • Freezing before the lights peak — you stand still outside 1-2 hours in sub-zero wind chill. Dress for it; see what to wear.

Why does an Iceland aurora tour help you get the shot?

Because the two hard parts — finding clear sky and nailing the settings under pressure — are handled for you. Every Golden Circle Day Tours departure checks the real-time vedur.is aurora and cloud forecast and drives 30-100 km from Reykjavik to a white (clear) patch, rather than hoping the lights appear over the city.

On the small-group minibus (max 19 guests) the guide helps set your camera or phone to the values above, you get free professional photos of your group under the aurora, plus hot chocolate and Icelandic snacks while you wait. Pickup from Reykjavik hotels is around 21:00, during the peak viewing hours of roughly 21:00-01:00. If the lights don't show, you get a free re-try — rebook any evening during your stay.

Solar Cycle 25 reached its maximum in October 2024 (NOAA), and the years around a solar maximum historically bring more frequent and stronger displays. Sightings are still never guaranteed; they need both solar activity and clear skies. Compare the three tour options or start at the Northern Lights hub.

Frequently Asked Questions